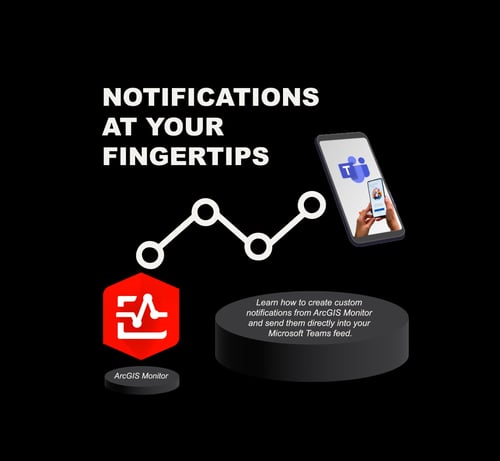
The newest version of ArcGIS Monitor is available, and it packs a lot of great improvements. One of the new features is webhooks from Collec...

A recent blog post I created walked users through setting up ArcGIS Monitor webhooks into Microsoft Teams using Power Automate. For this process to work with Power Automate, you must have a premium subscription, which is used by the webhook receiver. Today’s blog answers the question ”What if I don’t have the premium subscription license?“
Let’s walk through the setup and configuration of ArcGIS Monitor webhooks into Teams, Discord, and Slack with just Python. I will also provide you with source code to make your setup even more straightforward!
Before I dive into the code setup, there is an important piece of this configuration I’d like to explain. What we are creating is a translator between ArcGIS Monitor and the chat software. We are taking the JSON format of the ArcGIS Monitor alert and translating it into the format the application wants so we can show messages to the users. In other words, Teams, for example, has no idea what to do with the JSON provided by ArcGIS Monitor so we are going to translate it.

Generate a webhook URL from your chat client
The first step is to generate a webhook url. Use the sections below to see how to do this in your client of choice.
For the code you'll need, visit our GitHub repo. In the monitor-2-chat folder, you'll find a .py file for each chat option - Teams, Slack, and Discord. Download the Flask Web Server Python script for the chat application of your choice.
Put this code on a server. I suggest the server that hosts your ArcGIS Monitor installation.
Microsoft Teams

The first step in this process is to pick a Teams channel where the output from the Monitor webhook messages will end up. Once inside that channel, click the “Manage channel” menu item.

On the following screen, setup a webhook connector. Click “Configure” on the Incoming Webhook connector.

Give your webhook connection a name - something like Alerts from ArcGIS Monitor will work.

You can also change the image if you like. This is the avatar that will appear next to the Teams message.
Click connect.
After you click connect, you will then see the URL for this webhook: COPY this URL. You will need to add it in the configuration step below!
Click Done.
Open the file webhooksecrets.py
Paste the copied WebHook URL into the webhooksecrets.py file and add to the variable WEBHOOK_URL.
A note on security: Normally, a webhook request would be signed by a secret value; as of the time of this blog publishing, there is an issue with the ArcGIS Monitor webhook secrets. Once it is resolved, I will update the code in GitHub. I recommend upgrading the code at that time, as it will make this process much more secure. In the meantime, we have added a system-generated GUID to the end of the URL that the Flask app will listen to. When you run the app for the first time, look for this section in your command prompt. The URL listed here is what you will add to your Monitor webhook notification URL; see the monitor configuration below!

Slack

The process to set up Slack is very similar to Discord (included below).
- Go to https://api.slack.com/apps/ and log in with your Slack account
- Click “Create New App”
- Choose “From Scratch” and fill in the information
- After the app is created, click “Incoming Webhooks”
- Activate the Incoming Webhook Option
- Click the button “Add New Webhook to Workspace”
- Select the channel
- Copy the webhook URL and paste it into the webhooksecrets.py for the “Slack Webhook URL”

Discord

- In the Discord desktop app click the Gear icon to open the settings for the channel you wish to add the Monitor webhooks alerts to
- Click “Integrations” on the left side of the menu
- Click “Webhooks”
- Click “New Webhook”
- A new webhook will be created. Click the new webhook to configure the Name
- Copy the Webhook URL and paste in the webhooksecrets.py for the Webhook URL

Configure the webhooksecrets.py
Once you have generated the webhook URL for your chat client, you will need to place the URL into the webhook secrets file. The variable WEBHOOK_URL is where you will paste the URL.
Build a Python web server
We are going to build a small web server to do this translation. You will need a server (I used the same server where ArcGIS Monitor is installed) to run the code with Python 3.9+ installed. You will also need to install the following modules:
- Teams Only: pymsteams – handles the JSON creation for the message and the communication to the Teams channel
- Flask – creates the web application that Monitor will send the webhook payload to
- psycopg2 – connects to the PostgreSQL DB that is used by Monitor in order to convert IDs in the messages to full text descriptions
You can use the command pip install to install each of them: pip install <module name>
This blog post assumes you have permission to install and knowledge of adding new Python modules to your system.
For the Slack and Discord integrations we will generate the JSON payloads ourselves and send it to the appropriate endpoint using a POST via the Python requests module. Teams is a bit more complex and uses a specific library to send the information.
The source code divides each of these implementations into a separate file; you can find them in our public GitHub repository at: https://github.com/dymaptic/gis-data-utils/tree/master/monitor-2-chat
teams.py
slack.py
discord.py
In addition, there are two files, webhooksecrets.py, to store configuration. You will need to update the file with your settings as appropriate. The second file is utils.py for extra reusable methods.
Please read the Teams instructions, even if you are planning on using one of the other implementations. The Teams instructions has all the extra nuggets of information you might need!
PostgreSQL Connection
Next we will need to configure your PostgreSQL database connection.
A note about the PostgreSQL connection in the code. In order to connect to the database that houses the Monitor data, you will need to run the code from the same machine that is hosting ArcGIS Monitor or you will need to open the database port for connections to the machine from another server.
Run the App
Once everything is configured in the Python secrets, run the Flask Python app. If you want to see any errors with the code and do some debugging when you add your personalized touch add –debug to the end of this command line string.
In a command line window, preferably the Python command line, use the following command line string. Be sure to specify the Python script for the platform you want to post your alerts.
python -m flask --app C:\webhooks\teams.py run –debug
The debug parameter is optional, but I wanted to include it because it greatly helps with development and for the new features you are likely to add!
Monitor Configuration
The last step is to configure Monitor to send messages to your newly running Flask app. When you setup the notification for the alert, you have to input the server where the webhook will send the payload. You will need to use a DNS name for this. At this time Monitor does not accept a server IP as the location to send the payload.
Instead of using the external DNS that would resolve to a public facing IP address, I chose to edit the hosts file of the machine so that Monitor could resolve the webhook receiver location as pointing to localhost. The hosts file is located in the C:\windows\system32\drivers\etc folder.
I added the following entry:
127.0.0.1 webhooks.dymaptic.com
It doesn’t resolve outside of this server, meaning it is unreachable to the greater WWW, and I can keep the port closed to any outside traffic.
Input this server entry into the Monitor Webhook configuration.

I filled in a webhook secret. The python script will validate each payload based on this secret. At this time it only permits numbers. Copy and paste this secret into the webhooksecrets.py file in the space for WEBHOOKSECRET. Remember though, at this time this secret is not used to sign or validate any webhook requests (see above for details).
Important Note: This Python code has been written to process new alerts only. It does not handle incidents, components or any of the other notification categories. But it should give you a great start to writing your own translators.
Run The App and Get Alerts!
You will have to keep that Flask app running yourself. There are lots of tutorials online on how to configure Flask within IIS, or other webservers, so we left that out of this post for now.
This was a fun project and blog post. I hope you find it helpful, and maybe this can even save your organization a little bit on subscription fees. If you find yourself having questions or needing help, please reach out! You can contact our team at support@dymaptic.com.
For more information and other posts about Esri’s ArcGIS Monitor please visit our blog.
Related articles

At dymaptic we monitor many servers and services for our customers. We do this with ArcGIS Monitor, and one of the things ArcGIS Monitor doe...
In our last blog post, we shared how to send simple ArcGIS Monitor notifications to Microsoft Teams. Since then, we have been tinkering more...